Link contact IDs to media player recordings in Insights
You can insert hyperlinks to Contact IDs when you use the Contacts dataset in your Insights Analyses, allowing you to open a contact directly from Insights by clicking on its ID.
Prerequisites
-
You have the Insights Author license.
-
You have the Create Content permission.
- You have the View Content permission.
-
You have the View QM Data permission.
-
You have created a new analysis using the Contacts dataset with the following fields and filters:
-
Fields: Contact Start Time (under the Contact Date folder), Contact ID (under the Contact Properties folder), Contact URL Path(under the Contact Properties folder)
-
Filters: Contact Start Time, Contact URL Path. For more information on creating an analysis, see Create an analysis in Insights
-
Page location
Insights > Analyses > Click the Contacts analysis
Procedures
Step 1: Change the visual type
-
Click Visualize (the graph icon in the upper-left corner). The Visuals pane opens.
-
Click Change Visual Type and click Table
 .
.
Step 2: Add a control to the Contact Start Time filter
-
Click Filter (the funnel icon, upper-left corner of the page). The Filters pane opens showing any filters applied to the analysis.
-
Click the three dots next to Contact Start Time, select Add control, and click Top of this sheet.
-
Click Controls tile in the sheet and add the Contact Start Time between within the date range you want to view data for.
Step 3: Hide Contact Start Time filter
-
Click Visualize (the graph icon in the upper-left corner). The Visuals pane opens.
-
Click the three dots next to Contact Start Time, and select Hide.
Step 4: Add an action to the visual
-
Click Format visual. The Properties pane opens.
-
Click Interactions.
-
Expand Actions section and click Add Action. The New action pane opens.
-
Configure the new action with the following details:
-
Enter a name in the Action name field.
-
For Activation, select Select as the activation type.
-
From the Action type drop-down, select URL action.
-
In the URL field enter:
https://<<{Contact URL Path}>>. -
For the Open in option, select New browser tab.
-
Click Save.
-
Step 5: Format field and cell sections
-
In the Properties panel, select the Visual tab.
-
Expand Field styling and configure it with the following selections:
-
Select field to style: Contact Start Time
-
URL options: Make URLs hyperlinks
-
Open in: New tab
-
Style as: Link
-
-
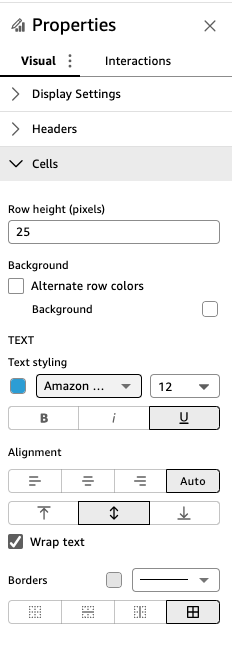
Expand Cells and change Text styling to Amazon Ember from the drop-down menu. The other settings are already configured. Refer to the image below for the final selection.
-
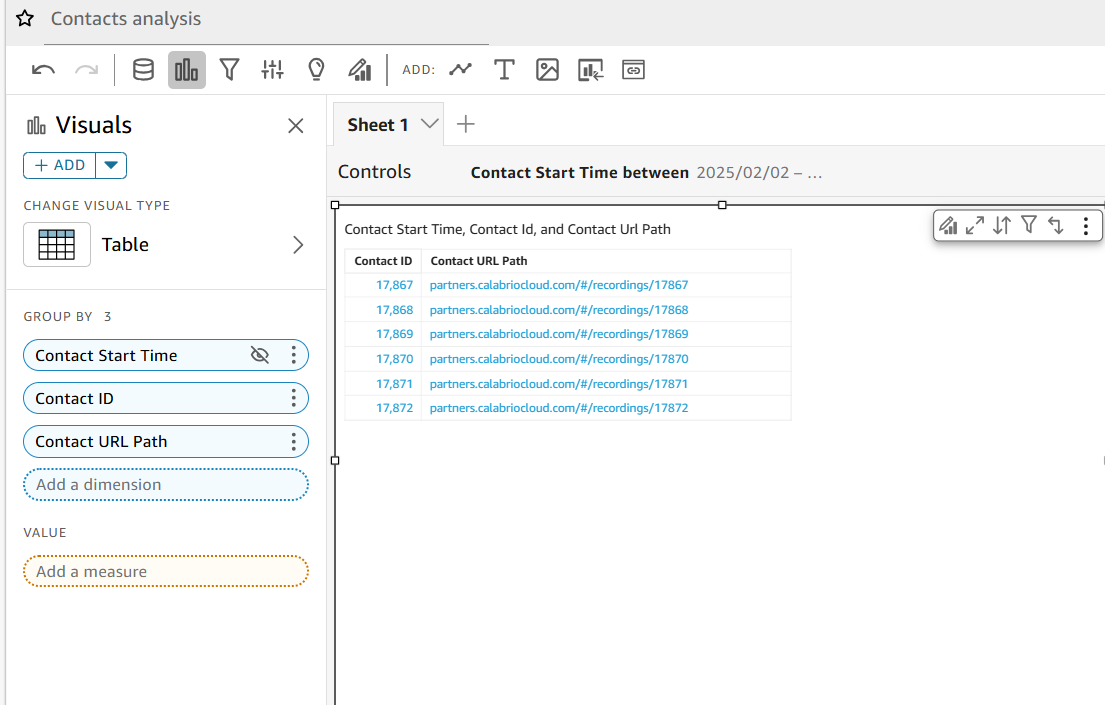
The final visual displays Contact ID and Contact URL Path in a table format. Click a link in the Contact ID or Contact URL Path column to open the corresponding recording in the QM Media Player.
Related topics